Processing payment imports
Transferring Imported Pmt. Files to Gen. Journals
The process of transferring imported payment entries (account transactions and remittance advices) into general journals can be, depending on the applied procedure, performed by a number of different menu items:
Open Pmt. Import Registers:
You have an overview of all registers still to be processed from here. You can import the data from here and open the general journal directly afterwards:

The payment import lines are copied into the general journal specified in the associated payment import interfaces.
The following field entries of the payment import interfaces will be considered when creating the general journal lines:
- Import to Account Type
- Import to Account No.
- Prefix Document No.
- Import to Journal Template Name
Import to Journal Batch Name
For more information on these fields, please refer to chapter Pmt. Import Interface.
Ext. Cash Receipt Journal → Pmt. Import:
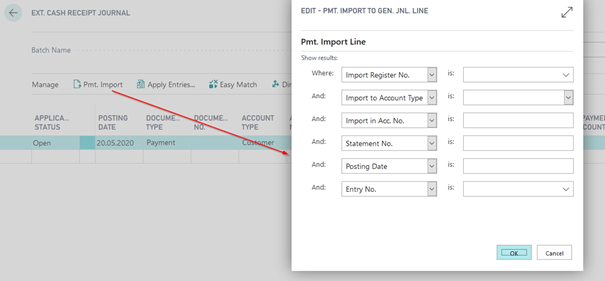
If you run this batch job by selecting it from a general journal, the payment import lines will always be transferred to this general journal, which means that it takes precedence over the entry of the payment import interface.
Select the requested import register and start the report by clicking OK.
Based on the specifications made in the OPplus Setup, in the Accounting Hint Texts as well as in the Accounting Rules, the system will try during the import process to apply open entries and to perform further pre-accounting.
After having successfully transferred the data into the general journals, the user must process and post each general journal. For more information, please refer to chapter Ext. Cash Receipt Journal (Processed Imported Files).
Import Lines with Zero Amounts
In the bank import file, it can happen that in the bank import file a number of lines are transferred with zero amounts. This can be the case e.g. if the bank institutions charge a bank fee in the end or in the beginning of a month and specific fee types were not payable. These lines are imported and shown in the Import Register. However, during the import into the journal these lines are skipped. To avoid that the user has to manually set these zero lines to “Posted”, this is done automatically by the system.
Creation of a Logfile for ‚Problem Cases'
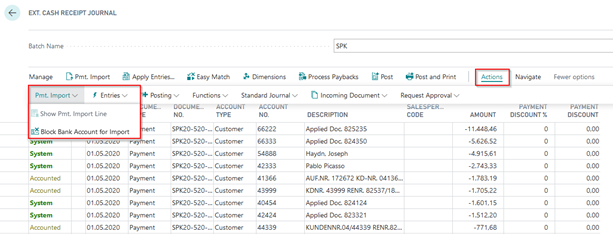
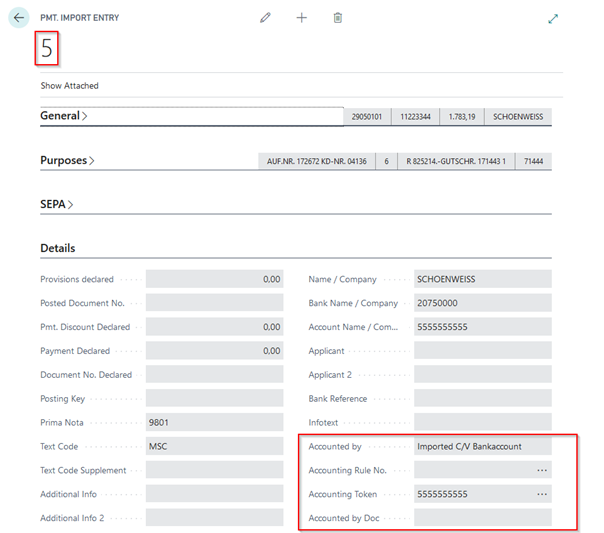
If you cannot explain an account assignment or the application does not assign an account, a Logfile can be created to see why the application behaves the way it does. To create a Logfile for the desired data record, you must know the entry number of the data record. For this purpose you can select the Pmt. Import line from the Ext. Cash Receipt Journal.
Here you can see two information, among others:
- The entry no.
- An initial indication of the account assignment
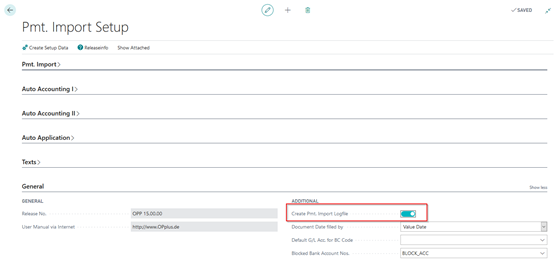
Then delete this line, because it must be imported again to create a Logfile. To create a Logfile, the "Create Pmt. Import Logfile" field in the Pmt. Import Setup must be activated:
To generate the Logfile report, reimport the payment import line. To do this, enter the Entry No. and the Import Register No. in the request dialog:
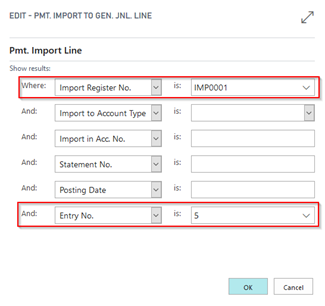
The system then asks if you want to download the Logfile. Depending on the settings, you will be asked where the file should be saved or the file will open in the background.
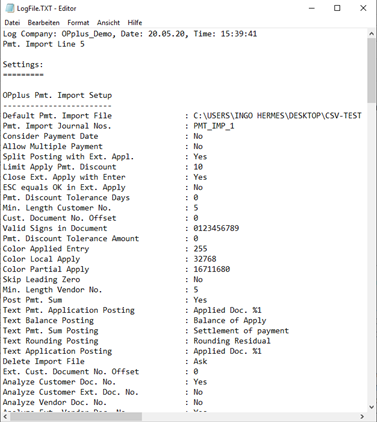
The file has the following structure:
OPplus settings:
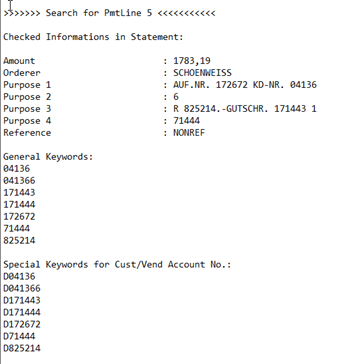
Search per line:
a. Purposes b. Display of keywords from purposes c. Special keywords (enhancements by settings
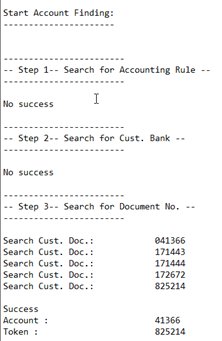
Search (Here you can see if the search process has been successful or not:
Propose Application, if Payment Amount does not match the Total Amount of Invoices
If several entries are found in the bank import, but remain unapplied since the payment amount does not match the total amount of invoices, the entries are optionally proposed for application.
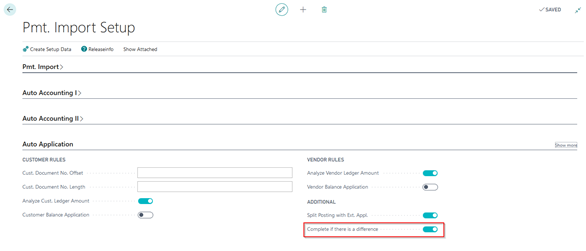
In this case, the journal line status will be set to “Complete”.
To activate this feature, go to Pmt. Import Setup “Autom. Application II” tab: “Always Fill Application Info“ field.
In the following example, the Ext. Cash Receipt Journal shows several documents, with a deviating amount of 1 cent. The status is automatically set to “Complete”. If you now open the Ext. Application, you can see that two entries have been automatically marked indicating a balance 1 cent:
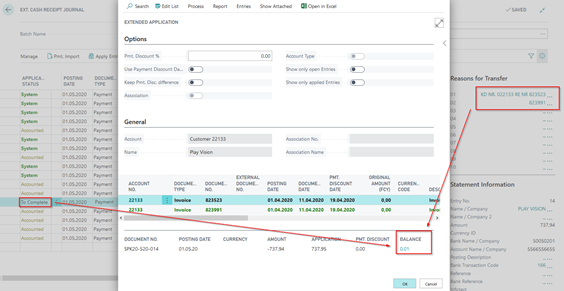
The user can now decide how to proceed with this deviation. However, it is advantageous to have the invoices automatically suggested by the system to avoid manual search of the respective entries. This is useful if an account has a large number of open entries and a large number of entries may need to be applied.
“Manage as Statement“: Total via Movement on Bank Acc. for Improved Reconciliation
For the “Manage as Statement“ option, the system will show the opening balance and the final balance of the associated bank statement in the “Statement Info“ fact box of the Pmt. Receipt Journal.
For better reconciliation, also the bank balance of the journal as well as any difference will be shown (by deleting a line).
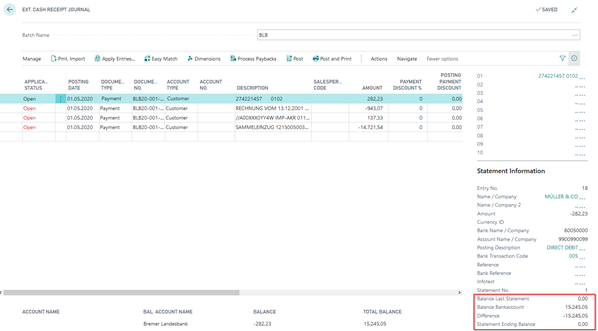
For example, if a line is accidentally deleted, the difference is listed accordingly:

This results in the calculation that the total of starting balance, bank balance and difference results in the final balance.
To calculate the bank balance, the bank account specified in the pmt. import interface will be checked. Then all lines of the current journal are checked and the collected values for the bank account are totaled.
It should be noted that the bank account can be in both the account and the balancing account. Also, the two-line import will be considered.
Furthermore, the pmt. import interface also offers the “Check Bank Balance“ field which enables to check for any difference:

Here you can determine if you want the system to create an error or a hint during posting if a difference is found.
The bank balance check is only executed for the first created journal line of a bank statement. Background: After posting a line, it is deleted and is no longer available for the balance check.